Front pin placements can be deceptively challenging, and they often lure even the most skilled golfers into making costly mistakes. In this issue, we’ll dive deep into why these seemingly inviting positions can lead to higher scores and how you can outsmart this common trap. With the right strategy and a smarter approach to club selection, you can navigate front pins effectively, keeping your scorecard clean and your confidence intact. Let’s break down the tactics that will help you manage these tricky situations and consistently perform at your best.
Course management, as elite players define it, involves strategically playing the golf course to maximize success and minimize the chances of making significant errors (double bogey or worse). On the PGA Tour, a statistic known as “bogey avoidance” has been gaining attention as of late. While top players have always considered it important, it has recently become more popular among the masses, partly due to discussions by notable players like Rory McIlroy. Bogey avoidance measures the percentage of holes played where the player scores a bogey or worse. Not surprisingly, the top two players in this stat on the 2024 PGA Tour were Xander Schauffele and Scottie Scheffler, both recording under 10%. They are, respectively, ranked #1 (Scheffler) and #2 (Schauffele) in the world.
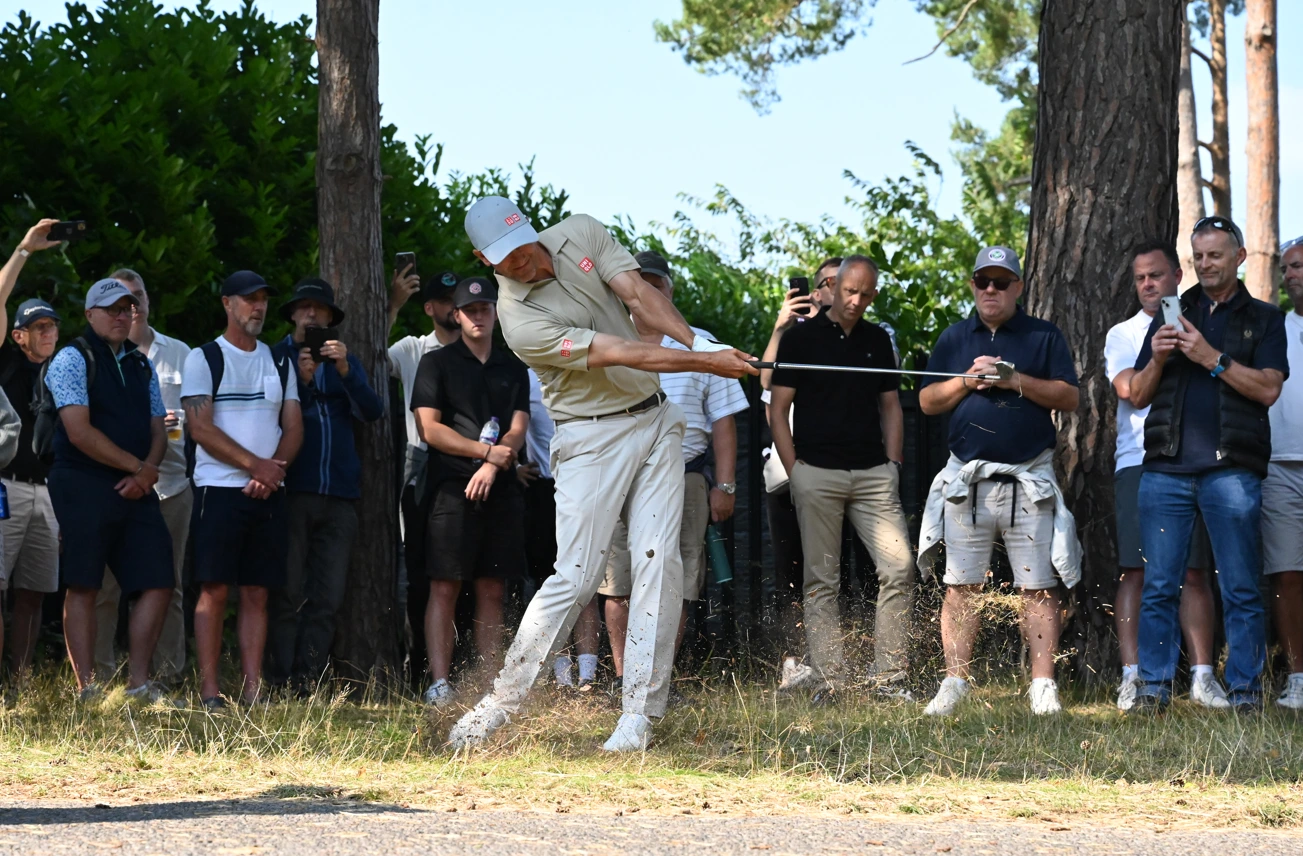
It is a well-acknowledged fact in elite golf circles that the quickest route to becoming a better player is by minimizing mistakes rather than simply making more birdies. With this perspective, I want to dive into a specific situation that routinely leads to scores over par, even for the world’s best players: the front pin location. These pins, often termed “sucker pins,” are typically guarded in front by deep bunkers and placed on shorter par 4s where players have scoring clubs in hand. The allure of a birdie opportunity often leads players to attack these pins aggressively, resulting in shots that end up in difficult positions like the short side bunker, thereby leading to over-par scores. Understanding the right strategy to handle such situations can significantly improve your scoring.
I’ve mentioned how even the world’s top players struggle with front pins. Let me illustrate with a scenario commonly seen among PGA TOUR players, which we’ll then analyze to understand the correct approach.
Consider hole #1, Round 1 from the 2025 Waste Management Phoenix Open, a 393-yard par 4. Here’s how the shot distribution looked after every tee shot for this year’s held:
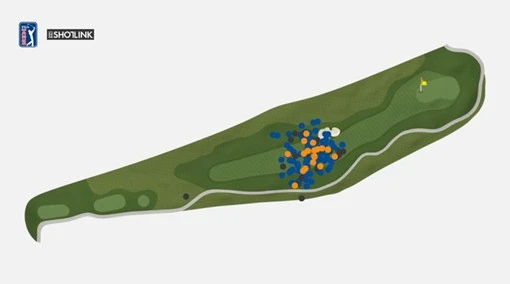
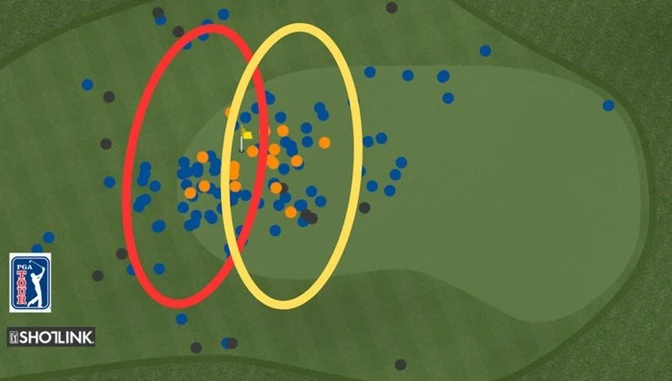
As you might expect, the shot distribution is tightly clustered around the fairway. Having played this hole many times myself, I can confirm that the only trouble off the tee is a fairway bunker, which most players manage to avoid. After a successful drive, players are left with an approach shot ranging from 100 to 150 yards—considered a prime “scoring opportunity” by any standard. Given that these are some of the best players in the world, you would expect nearly all of them to place their approach shots in close proximity to the pin from this distance. Now, let me show you the actual shot dispersion of the second shots on this very hole.
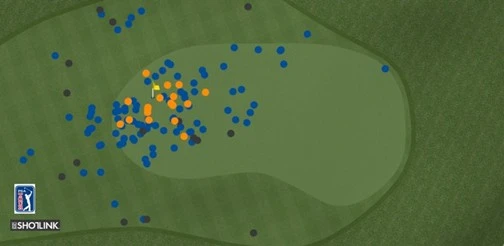
As you can see, a large number of shots fell short of the green. This pattern is not unusual; it recurs frequently at PGA TOUR events, with players consistently coming up short on approach shots to front pin locations from what are typically scoring distances.
So, why do so many shots end up short?
First off, players are often picking the wrong club. You might be wondering how I can be so sure. It’s all in the data I see time and again. Players are choosing a club that only works if they hit it perfectly—and let’s be honest, even tour players don’t hit it perfectly every time. Second, they might be stuck between clubs and just not fully committing to the swing, resulting in a less-than-ideal strike. Third, sometimes the weather, especially wind, can affect their choice of club. But, honestly, I see these short shots even on perfect weather days, so it mostly comes down to user error in my opinion.
Now for the fix.
Every golfer has a “shot pattern” for each club. If this is a new concept for you, it’s pretty straightforward: imagine hitting 20 shots towards a target on the driving range—you’d end up with a pattern that looks something like this…
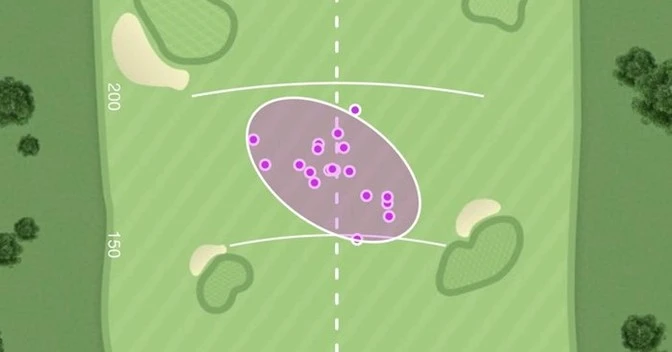
This is just an example, and sure, skill level matters a lot when we talk about the size and shape of the dispersion. But there’s one thing you’ll hand in most shot patterns: the oval that contains all the shots usually tilts downward from left to right (for a right-handed player).
This means pulls go long and left, mishits fall short and right, and everything else lands somewhere in between. Here’s something to remember—even PGA TOUR players have a shot pattern like this, which means they make mishits just like the rest of us.
When we look at actual tournament data, it’s clear that players often choose a club that only gets them to the target with a quality strike. We can tell because the shot dispersion on front pins is almost always skewed short, not long. So, the first step to better handling front pins? Pick a club that comfortably covers the distance, even if you don’t hit it perfectly. That might mean taking an extra club and swinging at about three-quarter strength. Let’s break down what this looks like with shot patterns…
By taking an extra club, your shot pattern will lean long, but many of your shots will still land near the pin. And that’s the main goal here—we’re always aiming for the highest percentage outcome. In this case, aiming beyond the pin ensures two things: you hit the green, and you steer clear of coming up short. Remember, coming up short often means finding a bunker or worse, especially since the front part of the green is usually the most guarded.
The obvious question I’m sure you’re asking is, “How far past the pin should I aim?” That depends on several factors: the distance of the shot, the exact pin location, the severity of what’s in front of the green (bunkers, water, deep rough, etc.), other potential hazards around the green, and your skill level and shot pattern. Fortunately, there are course management systems like “Decade” that teach you how to select targets based on these factors and math-based probability. If you’re not interested in this level of detail, fear not; you can simply assess the situation and do what feels right. Remember, by taking an extra club, you will significantly reduce the chances of coming up short, and your natural shot pattern will still afford you plenty of high-quality birdie opportunities.
Now, the solution to this problem is twofold, and the second part is about sticking to this game plan when you’re tempted by a front pin. It’s too easy to see that perfect yardage for your best pitching wedge shot, take the swing, slightly mishit it, and end up in a front bunker. These mistakes can mess up not just your score but also your mindset for the next few shots or even holes. We’ve got to get comfortable with the idea that playing “high percentage” golf isn’t just playing it safe—it’s about giving ourselves the best shot at consistently reducing mistakes. Plus, remember this: because we all have shot patterns for every club, choosing a longer target on a front pin doesn’t mean we’ll make fewer birdies. The natural dispersion of our shot pattern will still place many shots within striking distance, all while cutting down on those costly errors.
Remember, the key to consistently performing at the upper end of your ability starts with understanding and implementing high percentage strategy. By choosing the right club and aiming for the best possible outcomes, you can avoid common pitfalls and maintain consistently good scoring. Embrace the discipline required to make these strategic choices even under pressure. This approach won’t just lower your scores—it will also build your confidence and resilience on the course, making you a stronger, more formidable player in every round.